Design Your Own Art Project
Project Description
For this project, we had complete freedom in what kind of art piece we wanted to do, including different mediums and subjects. When starting this project we brainstormed different types of art, and I decided to focus on photography and photoshop manipulation. We were responsible for our own curriculum focusing on specific roles and expectations created for ourselves. So before starting we had to outline what the next few weeks were going to look like when creating our art. We then presented our final products at the all school exhibition.
Pre-assessment
Here is the link to my pre-assessment, which is my Teacher Creature Project that can be seen below.
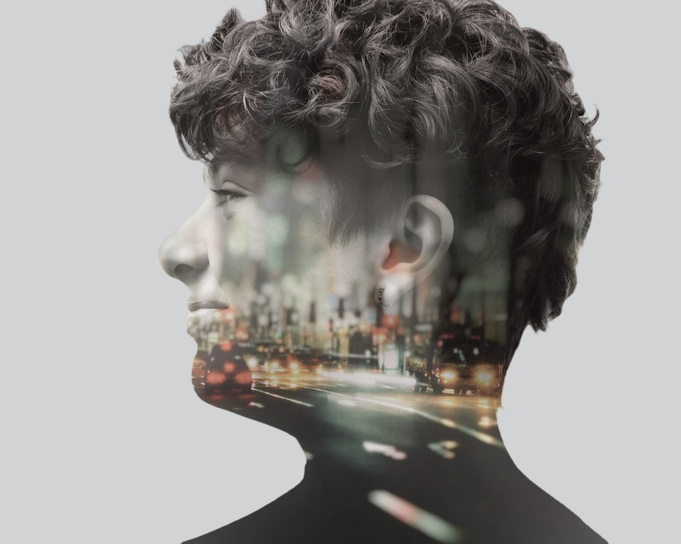
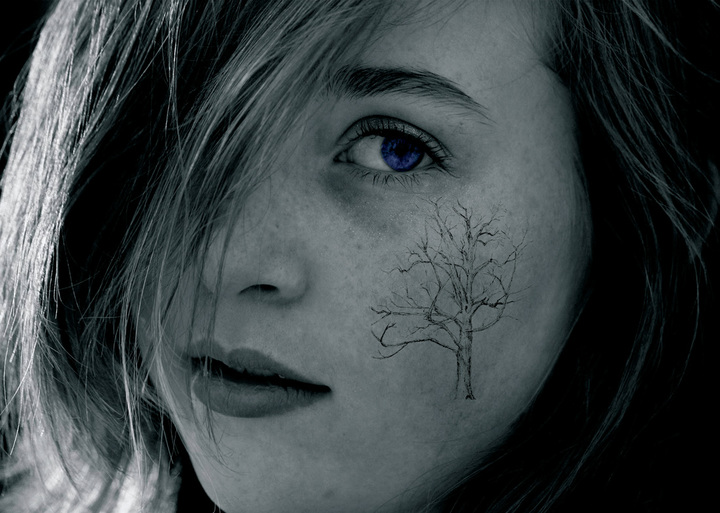
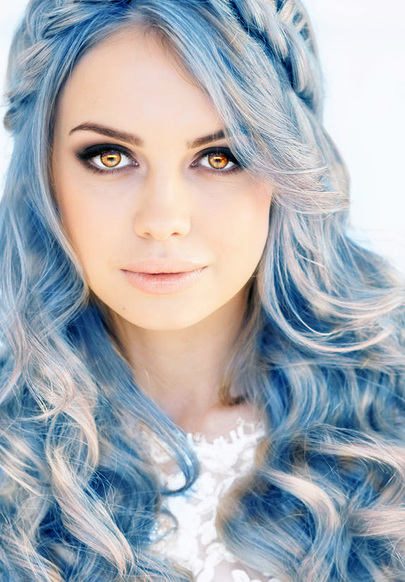
Final Product
Artist Statement
I decided to base my art project off of photography, because I have experience with photography, and wanted to practice portrait photography, which I hadn’t done before. When I first began my art project, I was planning on just focusing on black and white photography. After looking at different examples of photography, I came across some examples of photoshop manipulation on portrait photography, which I decided to continue with. My art piece consists of a profile photo of a girl which I ended up not decided to change to black and white. My final piece includes a picture of a road at night blended with the profile photo, using a double exposure effect. My inspiration for this project was a series of images I found that include black and white photography, and different types of photoshop manipulation. I spent a lot of time deciding on whether I wanted to follow one of the designs of theses photos directly, or come up with my own idea. By the time I began creating my art piece, I decided to follow the basic outline of a different art piece, but used my own photos and details. This art piece has given me a lot of practice in editing photos in photoshop, which I hadn’t done in the past, and inspired me to continue with portrait photography in the future.
Environmental Documentary Project
Project Description
To start this project off, my group had to choose/create a topic that our environmental documentary would be based on. My group chose to focus on why Colorado has the highest rate of avalanche deaths and injuries in the country. Once we had our topic decided, we started looking for people to interview for our documentary, to ensure that our interviews were well done, we studied camera angles and basic photography composition. After collecting the interviews we needed, we started searching for B roll and A roll to add to our documentary. For our science lesson, we created a stop motion explaining the details of how avalanches are triggered, and what can cause them. The end of the project consisted of editing our footage, and creating our final product in iMovie.
What problem-solving skills (21st Century) are employed in making works of art?
In terms of this documentary project, my group and I used many problem solving skills to create our documentary. The specific artistic aspects we used forced us to formulate ideas, and then figure out how to fix any problems we ran into when including this aspects in our documentary. The photography that we used in our documentary could have been better if we had used problem solving skills like coming up with alternative ideas, or finding solutions quickly so we could improve whatever art we were attempting.
Why do Artists Produce Preliminary Plans? (sketches, brainstorms, storyboards, etc?)
In my documentary, we created a storyboard before we even started collecting footage so we could have a basic outline and idea of what our plan was. All artists do this so they can experiment before they decide on an idea, and so they have something to refer back to while creating their art piece.
How and why is art used as a vehicle for communication?
Art is used as a vehicle for communication because different forms of art can connect to people more than something else could. The documentary my group and I made uses art for communication by spreading awareness about avalanche safety, specifically in Colorado.
Stop Motion Mini Project
To create this stop motion, I had my partner hold a piece of thread that the butterfly was attached to, and then took pictures with the camera facing up, so I would get a background of sky to simulate the butterfly flying. We got the different colors by placing a type of colored film over the camera before we took the picture. Once all the pictures were taken, we did some minor cropping, and placed them into adobe flash to create this stop motion.
For my upcoming documentary project, I can use some of the techniques used in this stop motion to improve the film. I can use different camera angles in terms of footage and interviews, and I can also use different lighting and coloring to make footage more interesting. My documentary is on avalanches, so I could definitely use different or unusual camera angles to enhance the footage I record.
For my upcoming documentary project, I can use some of the techniques used in this stop motion to improve the film. I can use different camera angles in terms of footage and interviews, and I can also use different lighting and coloring to make footage more interesting. My documentary is on avalanches, so I could definitely use different or unusual camera angles to enhance the footage I record.
Logo
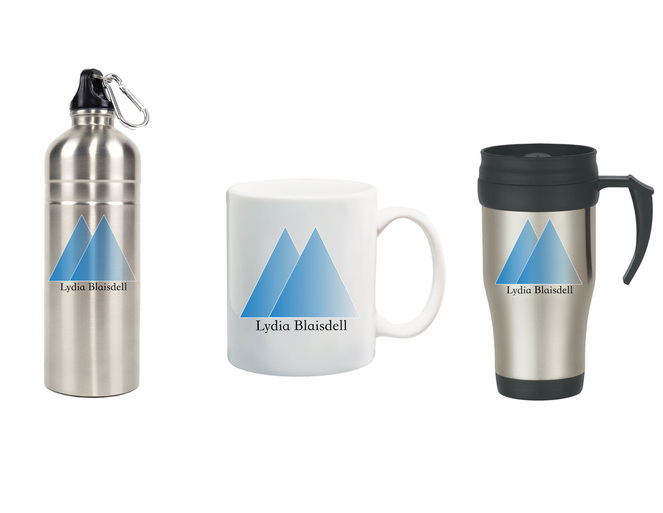
- Final logo on items

|
- Different logo examples

|
|
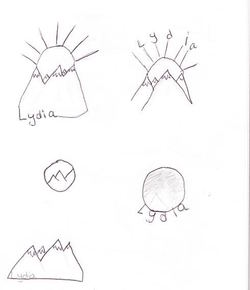
- Brainstorm sketches
Project Description/Reflection
For this project, I was asked to create a logo that could be for myself, a business, or anything else I might want. I chose to create one for myself. When I first started, I spent two days making preliminary sketches to formulate any possible ideas I might have, I then scanned these sketches onto a computer so I could use them in illustrator, I began playing around with outlining my sketches, but soon realized that if I used my sketch in the final logo, it would look messy. So I began to make lines that would create the basic outline of my sketch, as I did this, I realized that I liked a more simple design. At that point, I decided to have only two mountains, and began playing around with colors after I finished the outline. I started with just a black and white color, but then found a gradient option on illustrator, and tried it out. I found a blue gradient that I really liked, placed it into my logo, and decided to use it for my final product.
Self Portrait Project
Project Reflection -
For this self portrait project, I asked myself to what extent a work of art depends on the viewer’s point of view. When anyone creates a work of art, it means something to them, they are trying to get an emotion or feeling across. But they have no idea how other viewers will perceive the art. Different people all understand art differently, so an artist may be critiqued on something they had no idea even existed in their art. As I did my self portrait, I realized that as I was doing it, I was trying to predict how it would be received by others, and that really controlled my final product. If no one were to ever see my artwork, it most likely would have come out very differently. I then asked myself how are the characteristics and expressive features of art and design are used to create a self portrait. I decided that it depends if you’re coming from a technical or more open minded place. If you were coming from a technical place, my self portrait would most likely show possible characteristics of sadness or bleakness, because that’s what some of the colors could express to some people. If you were coming from an open minded place, the characteristics and expressive features within my self portrait could mean anything depending on what the viewer perceives. I think this is true for all art, anything can mean anything, it just matters on the person.
For this self portrait project, I asked myself to what extent a work of art depends on the viewer’s point of view. When anyone creates a work of art, it means something to them, they are trying to get an emotion or feeling across. But they have no idea how other viewers will perceive the art. Different people all understand art differently, so an artist may be critiqued on something they had no idea even existed in their art. As I did my self portrait, I realized that as I was doing it, I was trying to predict how it would be received by others, and that really controlled my final product. If no one were to ever see my artwork, it most likely would have come out very differently. I then asked myself how are the characteristics and expressive features of art and design are used to create a self portrait. I decided that it depends if you’re coming from a technical or more open minded place. If you were coming from a technical place, my self portrait would most likely show possible characteristics of sadness or bleakness, because that’s what some of the colors could express to some people. If you were coming from an open minded place, the characteristics and expressive features within my self portrait could mean anything depending on what the viewer perceives. I think this is true for all art, anything can mean anything, it just matters on the person.
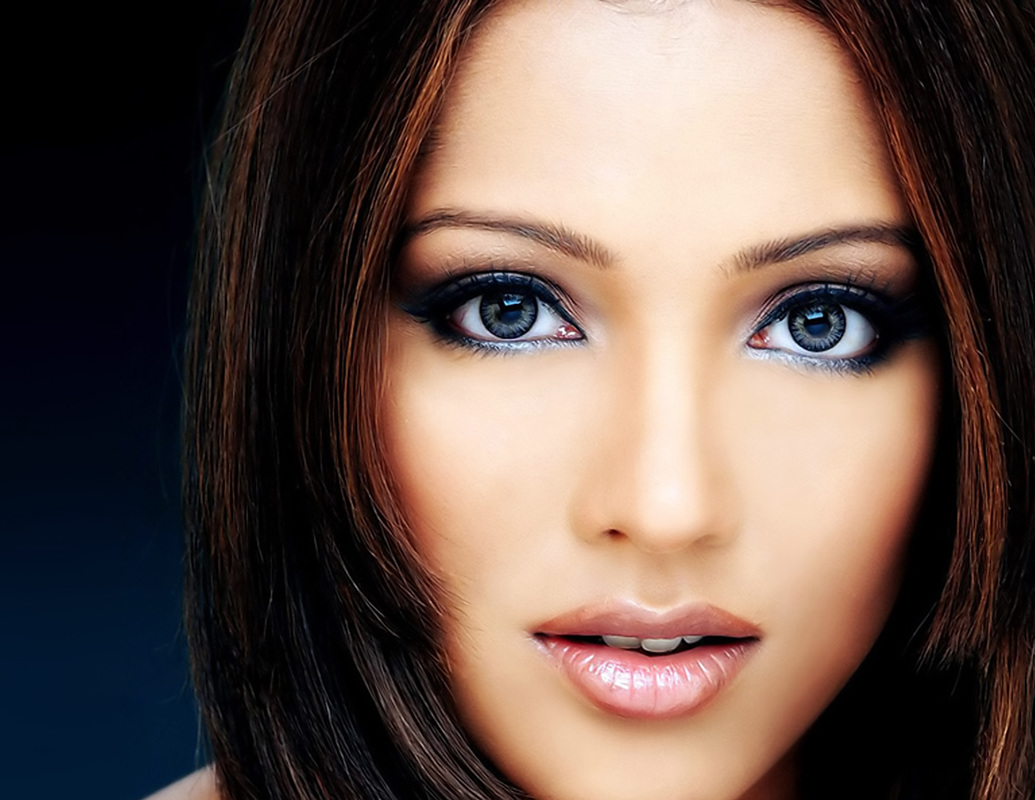
Teacher Creature Project


Project Reflection -
Our first major project was the teacher creature project, which gave us a chance to use our photoshop skills to use creativity to create a project. To start this project off, we created a google form, and sent it to the teachers that we were considering doing our project on. After I received responses, I drew a preliminary sketch for my teacher creature project before I started in photoshop. Once I had a good idea of what my teacher creature would look like, I started on photoshop, and worked through learning new skills, and utilizing ones that I already new. The hardest part of the project for me was deciding how to set up my teacher creature canvas. Although I had the preliminary sketch, it wasn’t working in photoshop, and I didn’t have any inspiration. I didn’t know how to combine all the elements I had brainstormed into one art piece, but what finally helped me persevere through this was finding a background that I could base all my elements off. Once I found that picture, I found the project a lot easier, and didn’t have as much trouble putting the project together. In terms of style, I’m still not sure if I have a specific artistic style, but most of the art I’ve done is fairly realistic. I also tend to lean toward more of a realism/modern style of art. My teacher creature doesn’t seem to really fit into any certain style, because it mixes many different aspects of art. Different artworks are created a certain way based on underlying structures already in place. A piece of art will end up a specific way based on the artist’s creativity, and what they envision the art piece to be. Personally for me, I chose a mountain background because of where I live, and mostly chose items that were familiar to me. The different life experiences that I have affect every piece of art I have ever created. Over all, I am pleased with the final product of my teacher creature, and I think it accurately portrays what I wanted to achieve.
Our first major project was the teacher creature project, which gave us a chance to use our photoshop skills to use creativity to create a project. To start this project off, we created a google form, and sent it to the teachers that we were considering doing our project on. After I received responses, I drew a preliminary sketch for my teacher creature project before I started in photoshop. Once I had a good idea of what my teacher creature would look like, I started on photoshop, and worked through learning new skills, and utilizing ones that I already new. The hardest part of the project for me was deciding how to set up my teacher creature canvas. Although I had the preliminary sketch, it wasn’t working in photoshop, and I didn’t have any inspiration. I didn’t know how to combine all the elements I had brainstormed into one art piece, but what finally helped me persevere through this was finding a background that I could base all my elements off. Once I found that picture, I found the project a lot easier, and didn’t have as much trouble putting the project together. In terms of style, I’m still not sure if I have a specific artistic style, but most of the art I’ve done is fairly realistic. I also tend to lean toward more of a realism/modern style of art. My teacher creature doesn’t seem to really fit into any certain style, because it mixes many different aspects of art. Different artworks are created a certain way based on underlying structures already in place. A piece of art will end up a specific way based on the artist’s creativity, and what they envision the art piece to be. Personally for me, I chose a mountain background because of where I live, and mostly chose items that were familiar to me. The different life experiences that I have affect every piece of art I have ever created. Over all, I am pleased with the final product of my teacher creature, and I think it accurately portrays what I wanted to achieve.
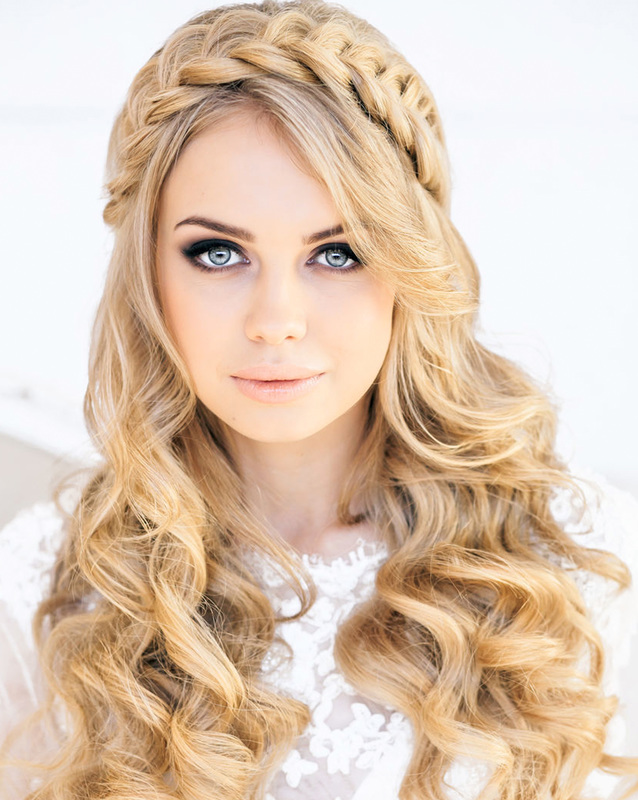
Photoshop Tutorials
Original Image (before)
|
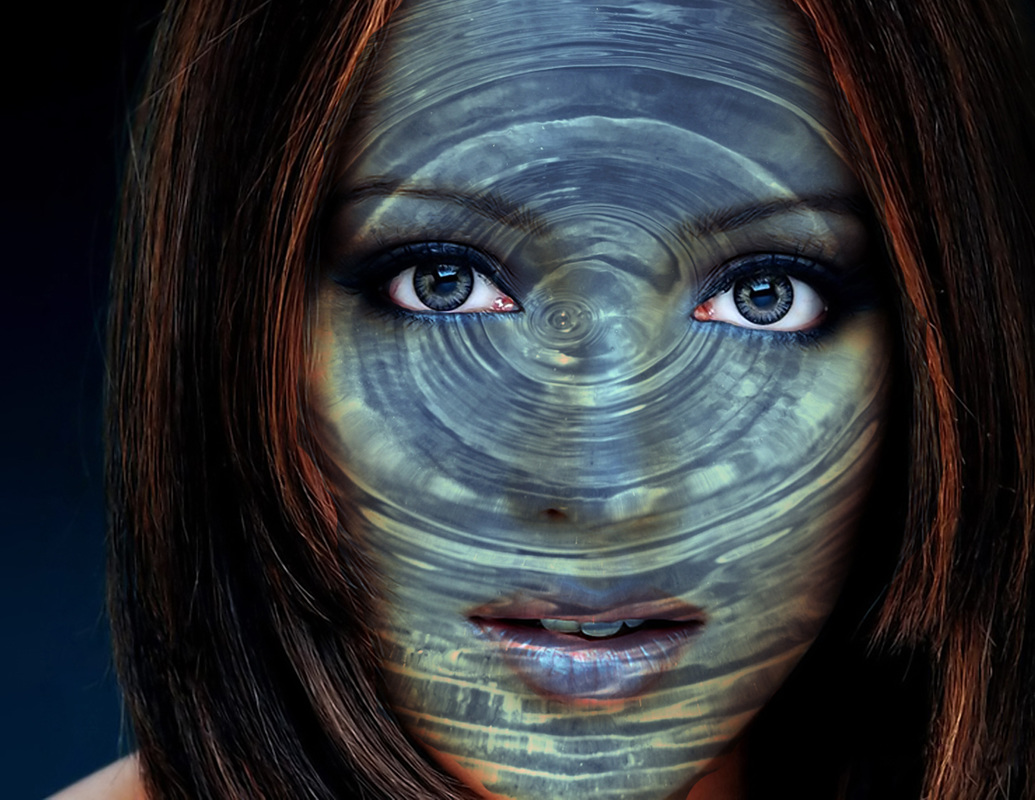
Photoshopped Image (after)
|
- I made a copy of the face, and applied texture by copying the picture of texture and making the picture of texture translucent.

Original Image (before)
|

Photoshopped Image (after)
|
- I selected the eyes, putting them in different layers, and change the hue, saturation, and lightness.
Original Image (before)
|
Photoshopped Image (after)
|
- I put the hair and eyes in different layers, and then changed the hair with brush tool, and changed the eyes by changing the hue, saturation, and lightness.
Foreground, Middle Ground, Background

In this mini project we went over scale, proportion, foreground, middle ground, and background. I show scale and proportion by changing the sizes of the flower, bird, and dog. The flower is in the foreground because it's larger than anything else, it has lot's of color, and has crisp texture and details. The dog is in the middle ground because the colors are less vibrant, the details and texture are softer, and the object is mid-sized. The bird is in the background, because it's more blurred, the colors are not vibrant, and it's the smallest item in the picture. This project really helped me understand the aspects that I mentioned above (foreground, middle ground, and background), and am now more comfortable with the specific photoshop tools used to create this. I was a little anxious starting this mini project, because I'm not very confident in Photoshop, and wasn't sure how I would do on the project, but am pleased with my final product.
Helpful Resources
Free Fonts (dafont.com)
55 Ways to Use Text
100 Ways to Use Text
Youtube Tutorials
Digital Art Online
55 Ways to Use Text
100 Ways to Use Text
Youtube Tutorials
Digital Art Online
- Photoshop CC Basics: http://jetsetcom.net/useful-resources/photoshop-cc-resources.html
- SHOW and TELL Photoshop Basics: http://simplephotoshop.com/photoshop_tools/index.htm
20091 HWY 160 Durango, CO 81301
School Main Office Phone: 970-247-2474
School Main Office Phone: 970-247-2474
